

I have sorta considered something like that several times… but I’m not sure it’s really worthwhile. It’d be pretty tough to get something like that built into the link connector (without making it much larger), so you’d need an external box that a link cable plugs into. And then you need to write some amount of driver code to run on the VB to talk to whatever WiFi device you’re using (some would actually require the TCP/IP stack to run on the VB).
The two candidates that I’ve considered in the past are the CC3000 and RN-171 (like these modules: http://www.adafruit.com/products/1469#Description and https://www.sparkfun.com/products/11049 ). They could both be used with the VB with a pretty simple hardware and software interface. I’m not totally sure about the specs of the VB regulator, but it could probably handle the extra power load. The link port has a 5V output, which would need to be regulated down to 3.3V… and the parts run at ~200mA-300mA (depending on Tx power), so you’re looking at about an additional 1W-1.5W (assuming a linear regulator). Not a lot of power, but almost doubling that of the VB (and the WiFi box might get a bit warm).
And though I’m sure the stuff will get cheaper over time… none of them are particularly cheap right now, so I can’t imagine many being too interested in spending an additional $40 or so (on top of the link connector cost) for standalone WiFi (which would require specific support from games). For about the same price, you could get a small ARM computer (Raspberry Pi, or similar) and simply plug in the USB cable and run the same USB link program that you’d run on a PC.
DogP
boom wrote:
DogP schrieb:
I’m not quite sure what you’re asking… but all pins are connected between both displays except the display select (pin 2 IIRC), and maybe pins 1 and 30 (don’t remember). So you can check continuity from the other display connector if you’re trying to find a place to connect.DogP
It’s where the black connector on the mainboard is. I tried to remove it and ended up with a mess. So both the left and right connectors share the exact same traces?
Yes… except for the pins I mentioned above.
DogP
I’m not quite sure what you’re asking… but all pins are connected between both displays except the display select (pin 2 IIRC), and maybe pins 1 and 30 (don’t remember). So you can check continuity from the other display connector if you’re trying to find a place to connect.
DogP
I’ve heard a couple other people have that problem… I’ve never personally seen it myself, but any time an IC is exposed to light, it has the possibility of its p-n junctions acting as photodiodes. Poor cable contact, plus small induced currents from that could be what causes it.
Most chips don’t have this problem because they’re housed in opaque packages, but since this one emits light, it’s in a transparent package. A similar effect can be seen with EPROMs’ exposed windows. I’ve heard of data glitches caused by bright flashes near the EPROM window (temporary, not the same as the erasing effect from UV). Try turning on/off the lights in your room, and shining a flashlight in there, and see if it has the same effect as moving your head in/out of the visor.
Either way, the real fix is to just fix the cable… but it’s an interesting problem.
DogP
I don’t think it’s particularly rare… every NIB VB I’ve owned over the years has had it still intact, though I’ve had a few system boxes (used, not NIB systems) without it too. Not sure I’d say it adds any value (maybe to the right collector?).
DogP
I’d say you’re almost certainly going to need dedicated hardware to drive the VB display with full resolution at full frame rate (running it over the link with compression works for special cases, but not the general case). The bandwidth needed for full resolution @ 50hz is about 2MB/sec.
If it were up to me, I’d do it with a USB interface to a cart, where you transfer the pixel data from a PC to the VB, and let the VB write it to the framebuffers (code running on the VB). Even that may be a little bit difficult to do, since the maximum bandwidth to the VRAM from software is ~10MB/sec, which doesn’t include fetching the data from the USB interface. You’d certainly want a tight assembly loop running in cache. One of the simplest circuits that I can think of that’d would work is an FT2232H in asynchronous FIFO mode. But that’s only 8-bits wide, so you’d be fetching twice as often as would be ideal. Having a FIFO in front of that to pull in data to be read out 16-bits wide would help, at the cost of more complexity. Overclocking the VB could help. Otherwise, limiting your requirements could also help (run at half the resolution, 25hz, etc.)
The other option of driving the displays directly is much more difficult (IMO) because you need to recreate the hardware to interface with the displays, you need exact timing, and don’t forget about correcting for angular velocity (typically corrected by the column table). You’d almost certainly be using an FPGA to recreate what the VB hardware already does for you. The advantage of it would be that you could set your own horizontal resolution (not fixed at 384), and could adjust the brightness on the fly whenever you want.
DogP
SirGuntz wrote:
How often do you ever see a red and black console?
Every day… when I look just to the left of me. 😉
DogP
The whole thing is pretty well stuck in place… the entire cable shouldn’t slide… just the individual wires.
That’s why I like to expose the copper traces before soldering, since you don’t have to worry about getting it hot enough to melt away the laminate… all you need to worry about is getting a good solder joint in place.
Good idea on the sewing needle… I personally use a fiberglass pen and rub it upward against the cable, like an eraser. That peels up the laminate nicely, without pulling up the copper.
DogP
If you use flux, the solder shouldn’t really glob up on the pins (should stick to the soldering iron)… but if it does, I’d use desoldering braid to carefully wick away the excess solder.
DogP
Depending what you mean by “low” temperature. The stuff is pretty heat resistant and doesn’t melt away at what I’d call low temperature. The heat does travel up the copper pretty well though, which isn’t good. It you really want to burn it away… I think the best way would be with a hot ball of solder. That way there’s very little mechanical force on the pins, and as you melt it away, you also tin the copper and solder the joints. You definitely want some flux though (not too much, or it might drip through into the LED bar).
On another note – I sent a replacement cable design out for fab on flex circuit… waiting to hear back whether they can actually manufacture it.
On another, another note – I got some Z-Axis tape… haven’t gotten a chance to play with it yet though.
DogP
If it gives people more time to actually make their games better… I’m all for it. Hopefully this doesn’t just mean that everyone gets two months off before crunch time again. 😉
DogP
SirGuntz wrote:
Ah, I see. Well, if the package wasn’t an issue, would a 44pin SOP chip still work? I’m thinking a 3.3v chip might not work, depends how the data/address lines hold up. One can sneak by with 3.3v chips on SNES carts with a SA-1 co-processor, but the voltages involved are less than 5v in that case (normal SNES games are 5v all the way).
A 44 pin SOP would work, just not as a drop in replacement for the mask ROM, and not that flash chip. You need a 16-bit wide 5V flash chip, or 2x 8-bit wide 5V flash chips… and your own board. IIRC, the Flashboy uses a 44 pin SOP.
DogP
SirGuntz wrote:
You mean using a MX29L1611 (or similar 16Mbit flash chip) doesn’t work? Looks like the VB mask ROM pinout matches that of the flash chip. Only major differences I can see are the flash chip runs on 3.3v (I assume VB uses 5v) and I think VB mask ROMs are a bit wider.http://www.buyicnow.com/fincat.php?cat=192
http://www.goliathindustries.com/vb/img/vbcart2.gif
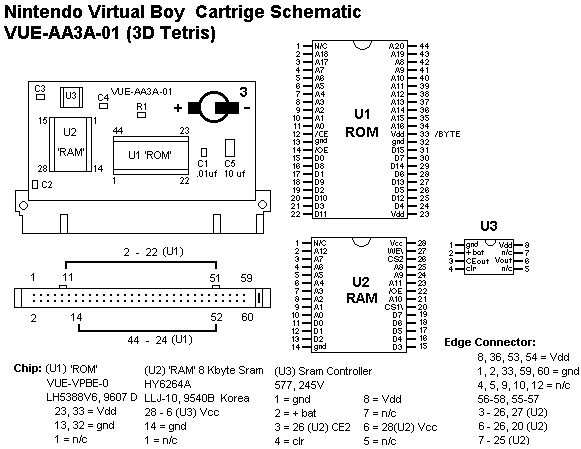
No… unfortunately the VB used the smaller 44 pin TSOP II (not the standard 44 pin SOP), which is a pretty uncommon package type for any chip… and seemingly nonexistant for flash ROMs. Here’s a zip with the datasheets: http://www.goliathindustries.com/vb/download/vbrom.zip . And yeah, they’re 5V devices.
DogP
Guy Perfect wrote:
DogP wrote:
When it says it can go up to 16MB, it just means that there’s 16MB of addressable space, not that the RAM is actually there. If you write to the space and the RAM isn’t there, nothing will happen… and if you try to read it, you’ll just read garbage.
Close. I had dasi test this for me before I had a FlashBoy of my own, though it was on a FlashBoy and not a commercial cartridge. What happened was the upper bits of the address were simply masked out, causing the 8 KB of SRAM to be mirrored across the entire address range.
Right, of course… on a cart with RAM (because there’s nothing decoding the address/chip select… just like the ROM). But on a cart with no RAM, you’ll write nothing and read garbage.
DogP
HollowedEmpire wrote:
I noticed too you also stayed away from the SRAM. The manual mentions it can go up to 16 MBytes so I’ve been highly tempted to use it because of that.
When it says it can go up to 16MB, it just means that there’s 16MB of addressable space, not that the RAM is actually there. If you write to the space and the RAM isn’t there, nothing will happen… and if you try to read it, you’ll just read garbage. The only carts that have any RAM on them are the ones with 8KB of battery backed RAM for save data.
If you really need more RAM, there’s an extra 12KB scattered across the framebuffers in VRAM. The screen is only 56 bytes per column (224 pixels), but the memory is set up that each column is 64 bytes… so each column in each framebuffer has 8 unused bytes. That gives you 384 columns x 8 bytes x 4 framebuffers = 12KB. It’s certainly not very convenient, and VRAM is a bit slower, but it’s free.
DogP
Hrm… I can try.
At startup, both systems write a 1 to the CC-Wr bit (bit 1) of CCSR (0x02000004). While waiting for the game to start, keep checking for a 0 on the CC-Rd bit (bit 0) of CCSR. When someone presses start, they set the CC-Wr bit to 0, which signals to the other system that the other player has pressed start (by seeing 0 on the CC-Rd bit).
There are a lot of ways to handle it from there, but I think the safest way is to have the system that writes CC-Wr to 0 automatically set itself to remote, and wait for the other system to detect the CC-Rd bit, set itself to master, and send a handshake message.
You could also write CC-Wr to 0 and simply delay for a short amount of time, and then set yourself to master and send the handshake message… assuming that the other system will detect it and go into remote mode fairly quickly.
Of course you need to have a timeout and handshake word/sequence, in case the cable isn’t plugged in, or the other system isn’t ready, or whatever. source code.
DOH! I tried. 😉
DogP
Yeah, COMCNT can be read/written at any time. Attached is the test app I threw together to verify the link cable (wiggled the connectors while it ran to make sure it didn’t drop bytes). It allows you to select master/slave and start/stop a continuous stream of data, as well as asynchronously read/write the COMCNT pin.
I quickly modified an old test app I had written, so yes, the code is ugly… but works.
To pick master/slave, I’ve done a few things. One was to simply have you select 1 or 2, which corresponded to master and slave. IIRC, on TicTacToe and 3D Battlesnake, I set them both to receive, and when one player pressed start it set itself to master and sent a start byte, so the other side would receive that and know it was slave (assuming both didn’t press start at EXACTLY the same time). I’ve also done the same thing with COMCNT, where you leave it high until someone presses start, and then pull it low to signal game start and who’s master. There are probably some other ways to do it as well.
DogP
Attachments:

Lester Knight wrote:
i have always had vertical black lines. they are very thin and move when i move. dogp discovered that they may be dust on the leds. wiping them off can fix it.
Hmm… vertical black lines? The ones I usually see with dust is horizontal (because the mirror goes back and forth horizontally, so a spec of dust, just like the LEDs, will be “draw” sideways).
RunnerPack wrote:
VRJZ wrote:
I’ve recently been seeing a vertical set of lines … that seem to come and go frequently…I’ve also experienced this. I believe it may be caused when the select line is still mostly connected, yet randomly failing for short periods (on the order of microseconds) the length of which is probably related to harmonics in the vibrating mirrors.
The select line usually keeps one display off while the other is being used (they both share the same set of signals, except for the alternating select line). If the connection “stutters” while, e.g. the left display is being drawn, a tiny fragment of the left display will appear, mirrored, on the right display.
It’s just another symptom of the same problem causing the horizontal lines: intermittent contact between the display and the VB due to failing adhesive. Soldering the cable should fix it.
Yep… I agree. I’ve seen the same thing… sometimes looks like a graphic equalizer, the matrix, etc. Soldering the cable should take care of it.
DogP
MineStorm wrote:
With these, we’re using pins from female USB sockets… soldered to a PCB that holds them in place inside the shell.
Do you have a photo ?
I don’t have one open right now to take a pic… but it’s just a small PCB that’s captured inside the shell that has pins from a USB socket soldered to it.
HP Lovethrash wrote:
I think I side with the “black only” group, although it would be awesome to make your VB imprint stand out by making that red somehow (probably cost prohibitive though heh).
Yeah, I’ll probably paint the VB red on one of mine, for display. I don’t think paint would hold up to continued use though… and yeah, trying to do two colors of plastic would certainly be expensive.
DogP