
Benjamin Stevens wrote:
Oh man. That would kinda be cool, but the hidden message would also be a major bummer: “Hey, remember Nintendo’s major commercial failure, ROB? How about we dress him up in one of Nintendo’s other major commercial failures?”
So you’re saying they’re going to give him 3DS hands and a Wii U base? 😉
Heh, sorry… I love those systems (well, 3DS at least… Wii U is lacking in good games ATM), but sales seem to say I’m in the minority. 🙁
DogP
MineStorm wrote:
AAMOI what are you using for the contacts on these prototypes ?
With these, we’re using pins from female USB sockets… soldered to a PCB that holds them in place inside the shell. The early models tried to use a Molex crimp pin, but they were almost too tall, and required a pretty precise mold to have the tangs hold the pins in place.
Lester Knight wrote:
i really like the red because it pops and it adds a nice contrast.
VBmills wrote:
I agree with you Lester on this one, red does look the nuts and pops with “look what I’m doing with my virtual boy”.
Yeah, I agree that it does kinda “pop”… and if I am able to do multiple colors for a reasonable price, I’ll probably get some done in red. One thought was red for USB, black for link cable… or something like that.
DogP
Yep… blurring at the edges of the screen is normal.
DogP
On the IPD/Focus screen (the one w/ the VB squares in the corners), you want to adjust the IPD so all 4 squares are fully visible. You should notice that when you turn the knob one way, the top ones start to disappear, and when you turn it the other way, the bottom ones start to disappear. You may only notice one set disappear, depending on your proper IPD setting (mine is near the middle).
DogP
It got here MUCH faster than expected (1 week with shipping, compared to the expected 3 weeks). 🙂 It looks good, but unfortunately, I think there are still a couple tweaks to make.
And I think the red color looks kinda cool, but I think black looks better. For the next print I might try white or translucent… just ‘cuz.
DogP
Attachments:

Yeah, the clear lens on the front of the display board.
DogP
Quick update… we’ve got a (hopefully) final design, that’s currently in the process of being printed (in red). As soon as that arrives (in the next week or two), I’ll check that the model matches the print and that there aren’t any remaining issues to work out… then it’ll be ready for mass production, so stay tuned.
DogP
Craby wrote:
I’ll give it a try, thanks DogP :] What could go wrong if it makes shortcuts everywhere after all ?
Heh, hopefully nothing… I’ve had several shorts over the years, and never seen any permanent problems (always cleared up as soon as I removed the short). Not to say that a bunch of them won’t hurt it, but a simple test with a multimeter should let you verify before powering it up.
HP Lovethrash wrote:
One final question (sigh…)- how should I clean the oscillating mirror?? I know the right answer is “I shouldn’t clean it”. There seems to be a smudge or something on it, which at first seemed like tiny scratches on the red plastic lens my peripheral vision would pick up. But, I can see now it’s actually on the mirror >:|. Not sure how it got there either, I was always careful not to touch it and always wore an N95 respirator mask when the VB unit was opened up so I didn’t blow any dust in.
Nice work… about the smudge, are you SURE it’s on the mirror? I’ve noticed dark lines several times, where it seems like it’d be the mirror or the red lens… but it’s actually dirt/dust on the clear cover over the LED bar. A simple wiping of the clear cover takes care of it.
DogP
I just came across something interesting… Z-axis Conductive Tape (like: https://www.sparkfun.com/products/12042 ). I think this (or something similar) might have been what they originally used at the factory for these cables. According to 3M, it’s main purpose is for connecting flex circuits to other to other flex circuits or PCBs.
Here’s an interesting quote from the datasheet:
Mechanical Clamping
To assure electrical resistance stability of Tape 9703 in any flexible circuit interconnection application, a mechanical clamp or other compressive force (i.e. foam strip held in compression over bond area.) should be considered in the design of the application. Any stress inherent in the assembly design (i.e. tensile, shear, cleavage) or temperature excursions (encountered through normal product use) applied to the bond area could result in an electrical open in the bonded circuit over time when no clamp or mechanism for maintaining a constant compressive forces is used. A well designed mechanical clamp will reduce the environmental stress on the bond line and improve the electrical reliability of the bond. In addition, the temperature operating range for the adhesive can be improved with a properly designed mechanical clamping system to ensure the conducting particles in the Tape 9703 maintain electrical contact. Several types of
mechanical clamps have been used successfully including foam strips attached to lids or cases and screw-attached plastic clamps. Contact your 3M Technical Service Engineer for further information about mechanical clamping.
So, if that’s what was used, and with no mechanical clamping… I guess even the manufacturer could have guessed that it’d fail.
Anyway, if anyone is looking for a solder-free method to fix displays… carefully peeling the cable from the display, cleaning the contacts, and carefully aligning/sticking the cable back down might be a possible solution. Of course a mechanical clamp would be a good idea, like: http://www.planetvb.com/modules/newbb/viewtopic.php?post_id=25208#forumpost25208 . And actually, if anyone is looking to try this, I’d be glad to perfect that clamp design and mail you a set (you need to provide your own Z-axis tape though… I don’t have any yet).
The datasheet specifies the minimum gap as 15 mil (0.4 mm), though below, it says “Minimum free space between adjacent conductors suggested to ensure electrical isolation. Customers may qualify finer pitch performance in their applications.”… so it sounds like it should work smaller, but you need to verify that there are no shorts. I believe the gap is approximately 0.3mm on our cable.
On another note… I want to see someone use it as an alternative to soldering BGAs, like they did for the QFP in the Sparkfun video. 😉 “Aww man… BGA rework is such a hassle”
DogP
I had also considered an SRAM cart in the past, but there were several things that kept me from pursuing it. One… large 5V SRAM isn’t easy to come by, and isn’t cheap (at least it wasn’t when I last looked… IIRC I have a lot of 512KB chips somewhere). Also, you’d need to make sure it was the low power SRAM if you planned to have it store the data across power cycles (otherwise you’d drain the battery fairly quickly).
My opinion was that flash can do pretty much everything that SRAM can do, though maybe just a little bit slower to write (though if you’re talking about using a VB<->PC cable as the programming cable… either one will be faster than the VB link port). I doubt any of us would ever hit the endurance cycles on one of the flash chips. You could put a bootloader in the upper half of a flash chip (and waste half the flash), or use a second flash chip. Two flash chips (like using a flash chip and SRAM) will make routing more tedious since you’ll need to route a bunch of duplicate address and data lines to multiple chips, plus the chip selector decoder logic. And I certainly haven’t looked hard, but I don’t remember seeing x16 SRAM chips, so that’s even more tedious routing to have 2x x8 SRAM chips, plus a bootloader flash chip, plus decoding logic.
And yeah, I don’t think there’s any reason to connect to the 0x06xxxxxx addresses (pin 5 is /WE, which works just fine for writing at 0x07xxxxxx).
Overall though, I think slapping an FPGA on a cart with some modern memory is the way to go. If I had time to finish projects, I’d just build a real cart like I prototyped up a few years back: http://www.planetvb.com/modules/newbb/viewtopic.php?topic_id=4060 . I’d love to have tons of extra RAM and an FPGA as a co-processor. Maybe I can pay off my house and stockpile a bunch of food so I can quit my job and finish these things. 😛
DogP
Tauwasser wrote:
Can we get an update on cost per cable type and cost of individual connectors?
bigmak is right about this… there’s really no way to estimate the costs right now. I just thought I owed you guys an update on the progress. To date, all prototypes have been 3D prints, which are (hopefully) more expensive (per connector) and lower quality (hopefully, as well 😉 ) than the final product will be.
Tauwasser wrote:
Do individual connectors have all six contacts or are there master/slave variants?
Eight contacts? 😉 All connectors will have all 8 pins in them, though a VB<->VB cable will have 6 wires connecting between them (connecting in the correct pinout), and of course a USB cable will only have 4. If anyone wants the raw connectors, it’ll just be a shell and pins (you can choose your own cable type and number of wires).
bigmak wrote:
I would love to see a way to get them into the hands of some of the developers (thunderstruck, guy perfect, danb, runnerpack..this could go on..).
Yeah, once we get a final 3D printed shell design, I’m hoping to offer a few cables with printed shells to developers, so people can start playing around with it while we’re waiting for the final shells (I’d send them replacement shells when they arrive). Of course that depends on how long the final shells will take… if they’d only take a few weeks, then I’d probably just wait for them.
DogP
morintari wrote:
Thanks for your answer DogP But i’m also wondering if it is possible to link up multi VB’s via link cable and USB hub without a computer. Is it possible to write a program and put it on a flash drive so that it automatically executes when plugged into the hub so you could bypass the computer all together?
No… if you’re using USB, this will only act as a device, not a host, so there has to be a computer (USB cable can’t talk to USB cable without a computer). You could use a small/cheap computer (like a Raspberry Pi or something similar), as long as it supports USB and you can run your own code on it.
DogP
Tauwasser wrote:
That would be the dedicated \RESET pin 7, see Cartridge Pinout.
Yep, that’s right. I wanted to say pin 7, but couldn’t remember for sure.
DogP
Guy Perfect wrote:
Does that mean the system won’t explode if you remove the cartridge while it’s running (provided it’s not trying to execute from ROM space)? What happens if you attempt to read a ROM address while no cartridge is inserted?
Yeah, you gotta make sure you’re not accessing the ROM for anything, but it runs just fine without the cart. Reading it without a cart reads just like any other address that has nothing connected to it (like the expansion area, upper 8 bits of the cart RAM, etc)… just random garbage, whatever state the data pins happen to be in with no driver (no pull up/down on the pins).
The one caveat is if you insert a cart with battery backed SRAM while the system is on, the system resets. I forget exactly which pin causes it, but you can lift the pin and it works just fine. I don’t remember if it was hitting an interrupt causing the reset (which could be disabled), or if it was shutting down the system hard. I’d have to dig through my notes.
DogP
morintari wrote:
Hey DogP I may be totally wrong in suggesting this but if the USB cable will allow you to do a rom dump of the game your playing. is it possible to change flash information(ie change the game your playing) w the FlashBoy while still inserted and not connecting the FlashBoy to the USB directly instead Having the only connection to the flashboy being the Link cable but still being able to change games? W/o removing the cart. If not why not?
It’s not particularly practical, but yeah… I’ve reprogrammed my own flash cart over the link cable. I’m not sure if flashing the Flashboy is possible like that though. It’d depend whether the flash /WE (write enable) pin is connected to the /WE on the cartridge edge (probably not, since it’s probably connected to the microcontroller on the cart).
The reason it’s not really practical is because you’re using the VB to write the flash (running the flash writing algorithms on the VB’s CPU), which means you need some sort of bootloader. It’s easy to add that to homebrew, but if you flash a commercial ROM to it, it’ll overwrite the bootloader, and you won’t be able to load it over the link cable again. You could add an extra ROM to the cart just for bootloading, or waste half of the existing flash to do it, but that’s not worth it IMO. It’s also not that fast (it’d take ~1 min to load a Flashboy). And if loading fails, your bootloader may be toast, and you’re back to where you started.
I did come up with a really small loader (48 bytes IIRC) that you could stick in a few interrupt vectors to load from the link (select by holding a button when you turn the VB on), though I never tested it, and I don’t really remember how it worked. It’d still require a modified ROM though, and still be susceptible to corruption.
Oh, and what makes this different than the ROM dumper is that you have a “boot cart” with the ROM dumper, then swap for the other cart you want to dump. You could easily have a boot cart, then swap for a blank cart to flash… but then you need two flash carts (one flashed with the boot cart code), which doesn’t really make sense.
DogP
morintari wrote:
That is if you will you be able to play multi-player games (greater than 2 player) using the usb link and a multi-usb hub for your computer?
Sure… there’s no reason you couldn’t use more than one USB connected to a computer, or have several connected together over the internet. Of course the games and PC software don’t exist for that yet, but there’s no reason it wouldn’t work.
DogP
HorvatM wrote:
How did you do that? Wouldn’t you need specially programmed ROMs to do any communications?
Well yeah, I wrote the code, and used it in homebrew stuff (you couldn’t read/write memory while running an unmodified ROM). The ROM dumper ran from RAM, so you could hot-swap the carts. Of course if you modified a ROM, you could do this stuff while the game ran. I was going to try that to do save states, or a Game Shark kinda thing, but never got around to it.
HorvatM wrote:
Can data be transferred fast enough for full VB-quality video? If so, then who needs an Oculus Rift? 😛 Also, it would then be possible to display video from the VB on the PC and record it (with hacked ROMs, of course).
The speed of the link port (on the one VB I tested) maxed out around 280kbit/sec, so no… uncompressed full frame VB video in/out wouldn’t work in real time. Each display is 384x224x2bpp, so 172,032 bits per display, or 344,064 bits for both displays… so it’d take over a second to read or write a full display. For full quality video, you’d want to use the data bus (which could easily do it with something like an FT2232H on a cart).
I don’t remember exactly how Alberto was doing his, but I think he used LZ compression, and only transmitted the chunks of the display that were being used… so it was usable for some cases (IIRC, his demo used a shaded rotating cube, which compresses well compared to a random bitmap).
DogP
Lester Knight wrote:
Any idea on what the final cost might be? Will you sell these as a set or allow us to pick up one or the other? Will they come in any color choices? Do you guys have plans to include a homebrew or two?Cheers!
Cost is still up in the air (highly dependent on the molded part cost), though of course I’m trying to make it as affordable as possible. I’m expecting to lose money on this (or at least not recoup it for many years), but it’s something I really want for myself as well as for the community.
The plan is to sell the link cable and USB cable individually (and even as raw connectors/pins if you want them for your own project)… and if the manufacturer can do them in multiple colors, I’ll probably consider having red and black connectors… but if it adds significant cost, they’ll probably stay all black. The next prototype will be in red though, so we’ll see how that looks.
I’ll have homebrew examples for download, which you can load onto your flash cart to try it out, and also to see the code for using on your own homebrew.
DogP
Thanks for the comments, guys.
MasterOfPuppets wrote:
Would it be possible to dump carts with the USB cable?
Yeah… when I built my first prototype VB<->PC cable years ago, a ROM dumper / memory reader/writer / remote code executer was the first application I wrote.
The hope was to make a simple debugging interface with watchpoints and stuff, but after spending a little bit of time on it, I decided rather than reinventing the wheel (poorly), I should invest the time in making it work with GDB. Unfortunately, I don’t have a lot of experience with the inner workings of GDB, and it seemed pretty complex. :/
I don’t remember if Alberto ever released his Virtual-E project with the USB link code added, but it’s pretty cool rendering things in OpenGL on the PC and viewing them in 3D on the VB.
DogP
I know I haven’t been keeping this thread updated… but we’re still moving forward, making quite a bit of progress. Just figured I’d drop by and post a few pictures of the latest prototype.
There are still a few tweaks to be made, but this version is fully functional. I’ve built up both a VB<->VB link cable, as well as a VB<->PC cable, and both are working great. So from here on out, it should be a matter of making the final tweaks to the model (yes, Bat VB will flipped 😉 ), and then actually getting the molded plastic part made.
BTW, did I mention that Hedgetrimmer is awesome at this stuff? 🙂
Link Cable:

USB Cable:

Detail:

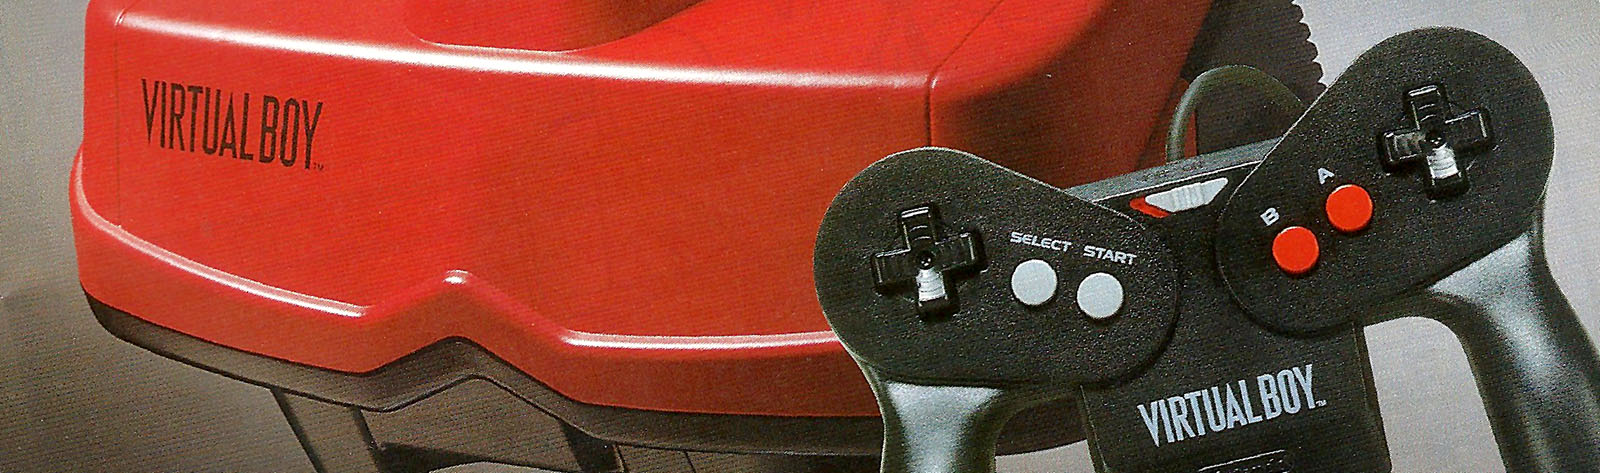
System Front:

System Back:

DogP


